Beaver Team Pro – Documentation
Plugin:
Getting Started
Install and activate plugin
- The plugin is available to download from your account area
- You'll also need your licence key, which is with your invoice.
- Install the plugin on your site and activate.
Add your licence and activate modules.
- Navigate to Settings > Beaver Builder > Developer
- Pick the Beaver Team Pro modules you want to use
- Enter your licence key at the bottom of the page
- Hit Save and your licence should be validated and module activated and ready to use.
Module:
Update All
Make bulk updates across your entire website. Change colors, margins, paddings or any other setting inside Beaver Builder modules.


The update all window
Specify where you want to update, or leave as-is to truly "update all"

Conditional Updates
Update by post type, page slug, or module setting.
NOTE: Using this setting ignores "Update this page only" checkbox


MODULE SETTING
Update modules with existing settings applied to the module.
Useful for if you have multiple module "types" and you don't want to overwrite them all.
In this GIF, we update the background color of the buttons, only if they have a matching background color.

Module:
Default Modules
Overwrite the existing default modules, to make it faster and easier for everyone to build out a branded website.
METHOD 1: Save entire module as default
Style an entire module, and create a default in one clean sweep.


After saving your default module, the "Update Defaults" dropdown will update to "no", so that publishing your page in the future won't re-update your modules. Re-select "yes" if you want to re-modify your defaults.
METHOD 2: Individual settings
Bulk-update a module setting and set it as a default. Leaves the other settings as-is.
NOTE: You must have the Bulk Updates module activated.
- Use the bulk updates module as you normally would (see above instructions).
- Select "Set as Default" to have these settings applied to your module as a default.
")
Reset default modules
If you want to start fresh with your module defaults, you can clear them by visiting this URL. Do not bookmark this URL as it will clear your defaults every time you visit it.
{your-domain.com}/wp-admin/options-general.php?bt_action=clear_defaults&page=fl-builder-settings#developer
NOTE: replace {your-domain.com} with your website's domain.
Module:
Color Sync
Include color sync on all admin pages
This is handy if you have color pickers in your admin area that you want color sync to be enabled on. Ensure you have 'color sync' enabled in BB Developer settings.
Place this code in your functions.php (or similar) file to ensure Beaver Team color sync loads on all admin pages.
add_filter('bt_color_sync_in_admin','__return_true');
Module:
Conditional Rows and Columns
Step 1: Access the page builder through the page you wish to edit.
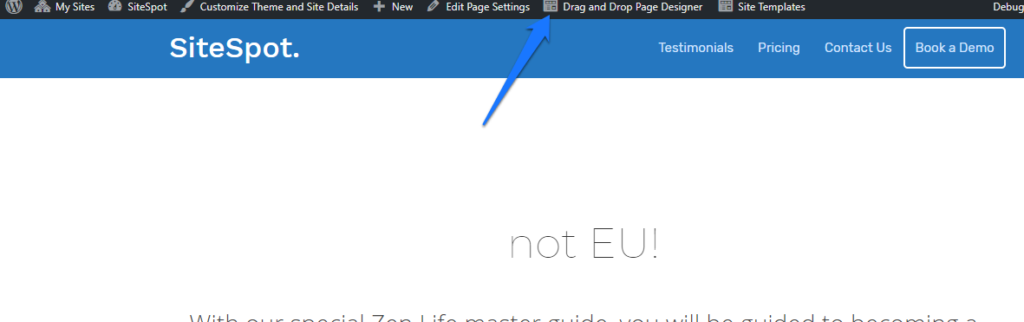
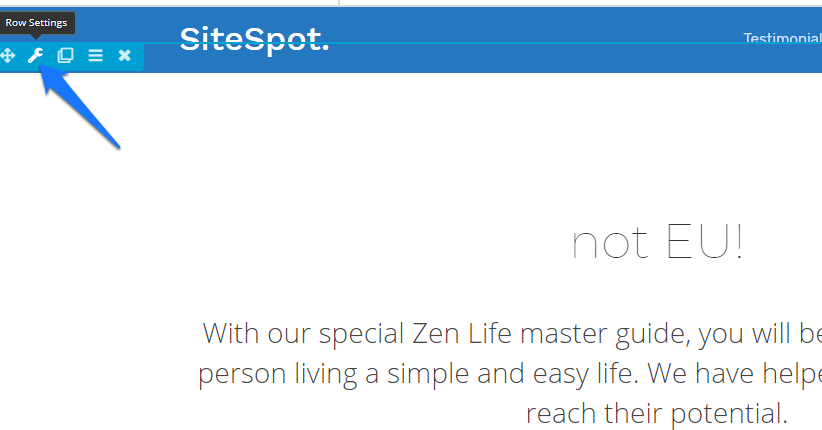
Step 2: Click the Row Settings icon on a row you wish to edit to set the conditions.
Step 3: Under the Advanced tab, scroll down and set the Display Visibility to Conditional - BT.
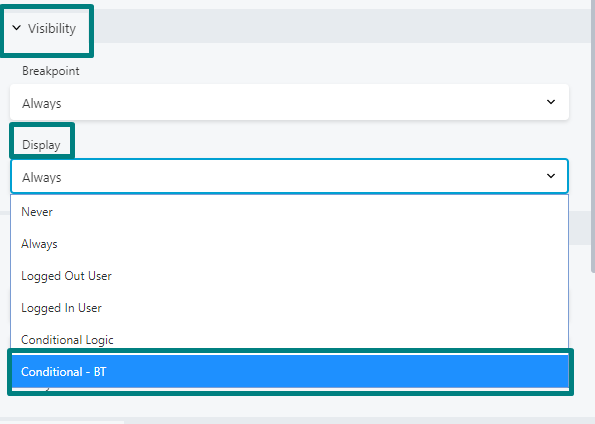
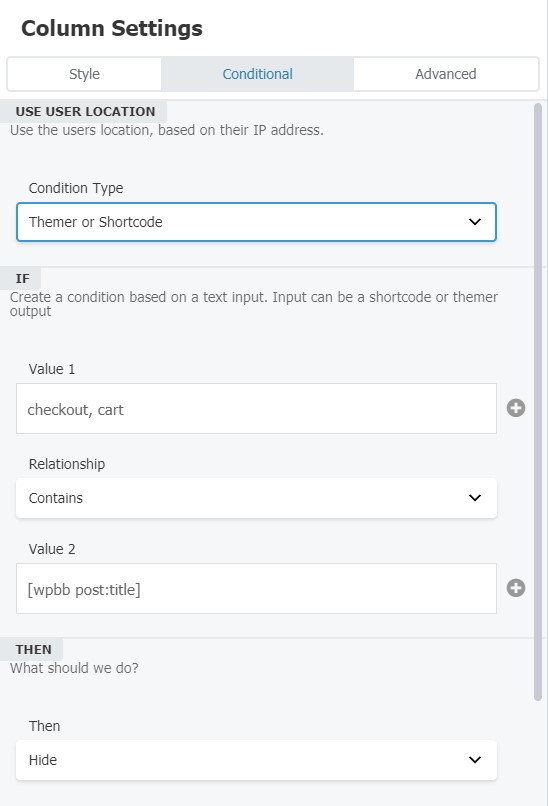
Step 4: Next, head to the newly visible 'Conditional' tab. Then you can select between location based conditions, or themer/shortcode conditions.
LOCATION BASED CONDITIONS
Enter the country code/s of the countries you wish to be added into the conditional visibility. Set whether you wish to hide or show the rows to the countries with the codes you entered.
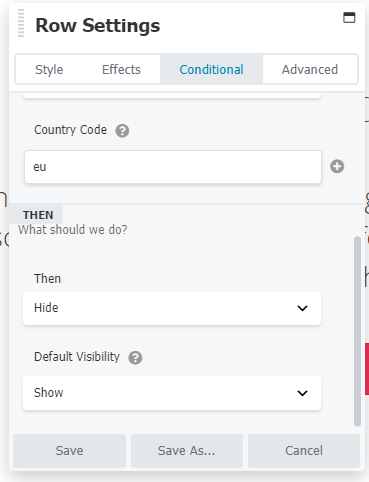
Note that this will not work if you enter country names. Only country codes are accepted.
Use this as a reference for country codes.
Tip: Use the code EU to target all countries within EU.
SHORTCODE BASED CONDITIONS
Use an if this then that style query to show or hide your rows. In this example we are hiding the header menu if it's a WooCommerce checkout page (the post title contains checkout or cart)
Module:
Bulk Color Update

Step 1
Make sure the module is activated under Settings > Beaver Builder > Developer
Step 2
Head to the color updates page: Tools > Page Builder Bulk Color Update
Step 3 - Set Up
Choose the post types you want to update
Insert the old and new colors (HEX color code) to be replaced.
Step 4 - Replace.
The tool will search through all your Beaver Builder enabled pages and swap the colors for you.
